Frequently Asked Questions
Versently is an international lifestyle app for curated city routes: restaurants, galleries, museums, and walks. A user sets the scenario, and a lifestyle guide helps bring it to life with a focus on atmosphere and aesthetics.
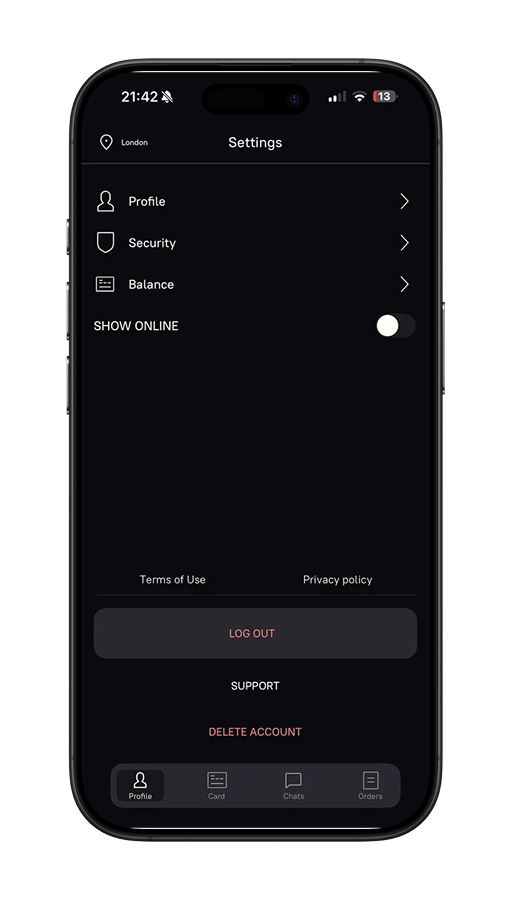
“Show online” option
In your profile settings there is a toggle called SHOW ONLINE.
• If it is turned ON — your profile is visible in the general list of guides. Clients can find you directly, view your profile, and choose you for a tour.
• If it is turned OFF — your profile is hidden from the general list. However, you can still respond to requests in Orders → Incoming. In this case, clients can only choose you via your responses, not directly from the feed.
This option lets you control your visibility: whether you want to actively receive new requests or stay more “behind the scenes”, responding only when you feel like it.
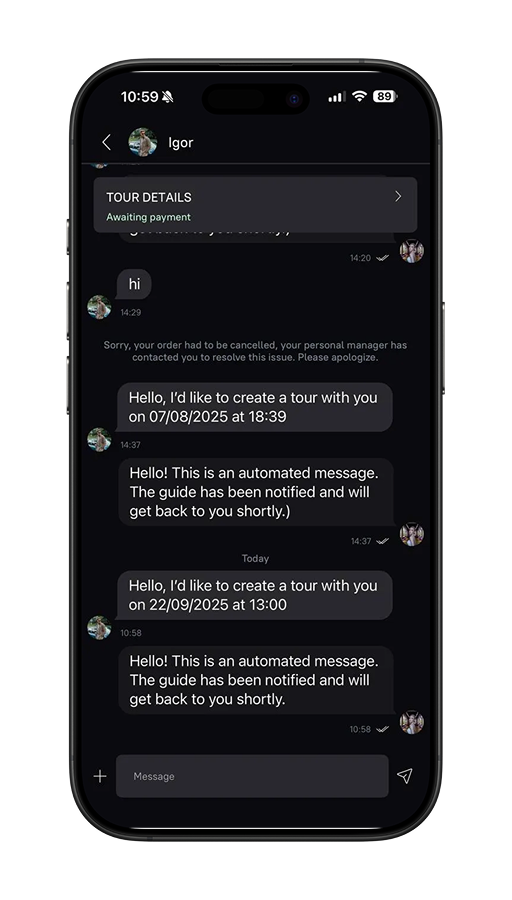
How to confirm a tour in the app?
1.Receiving a request
When a user creates a tour in your city, you receive a notification. The request appears in Orders → Incoming.
In the tour card you will see: the city, date and time, client’s name, selected place, and a photo of the client/location.
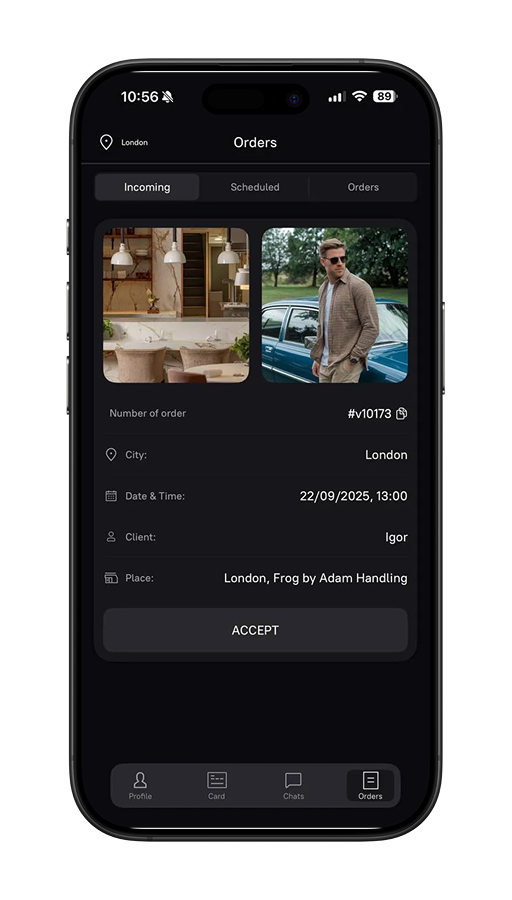
2.Accepting a tour
To respond:
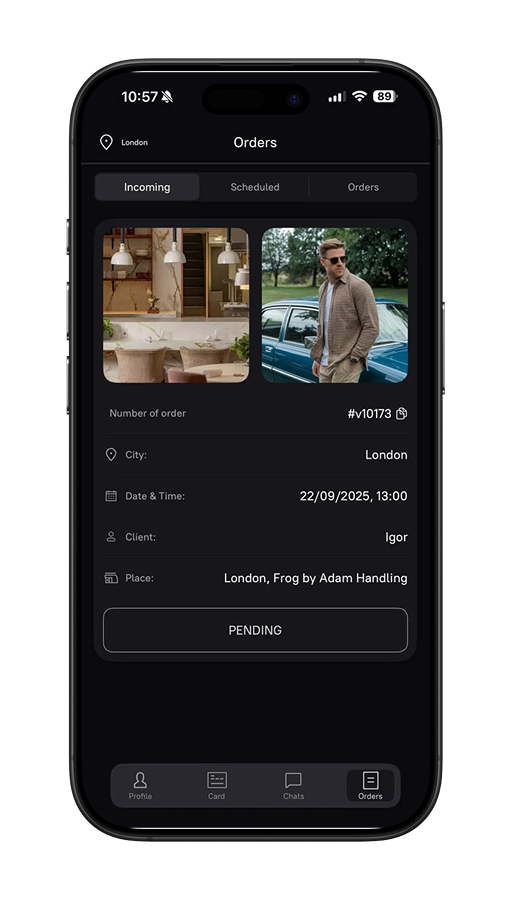
• Tap “Accept” in the tour card.
• Review the cancellation and payout terms.
• Tap “Confirm”.
After that, the tour status will change to “Pending”, and the client will receive your response.

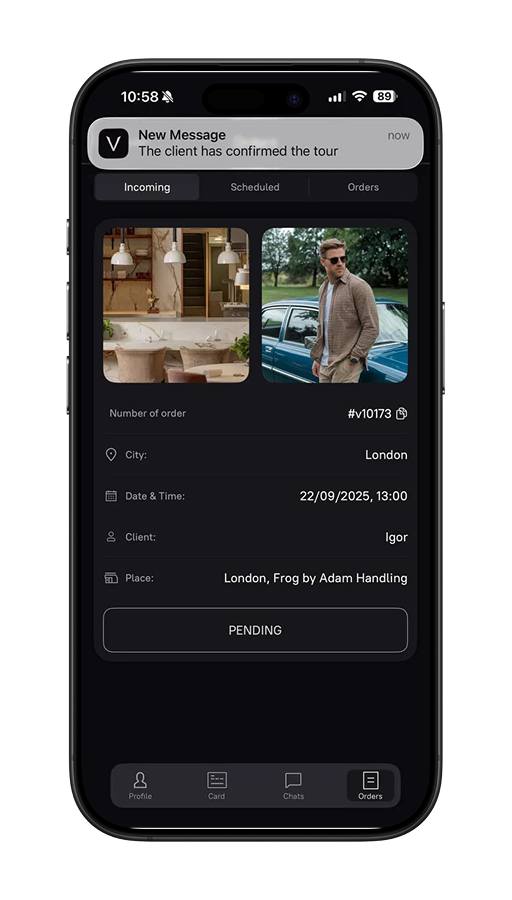
3.Client confirmation
A client may first write to you in chat and clarify the details — or choose you for the tour right away.
Once the client confirms, you’ll receive a notification and the chat with them will open.
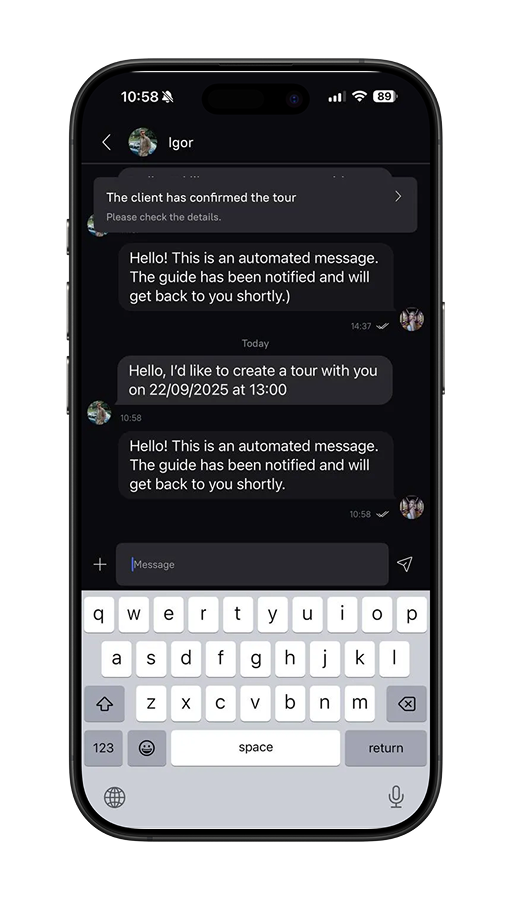
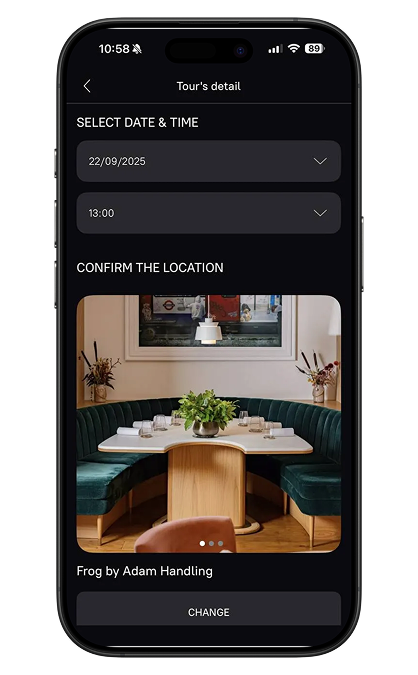
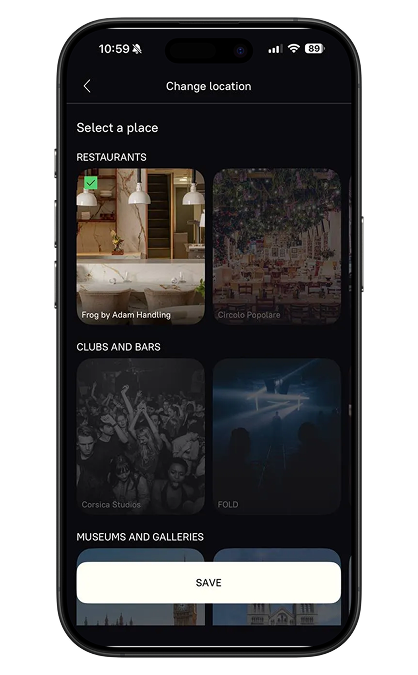
4.Discussing the details
When the chat becomes available, start a light conversation:
• Introduce yourself and keep the conversation friendly.
• Clarify what kind of places and format the client is interested in.
• Discuss the budget of the lifestyle tour and agree on the amount before issuing an invoice.
Any changes (date, time, place, amount) are recorded via the bar at the top of the chat.

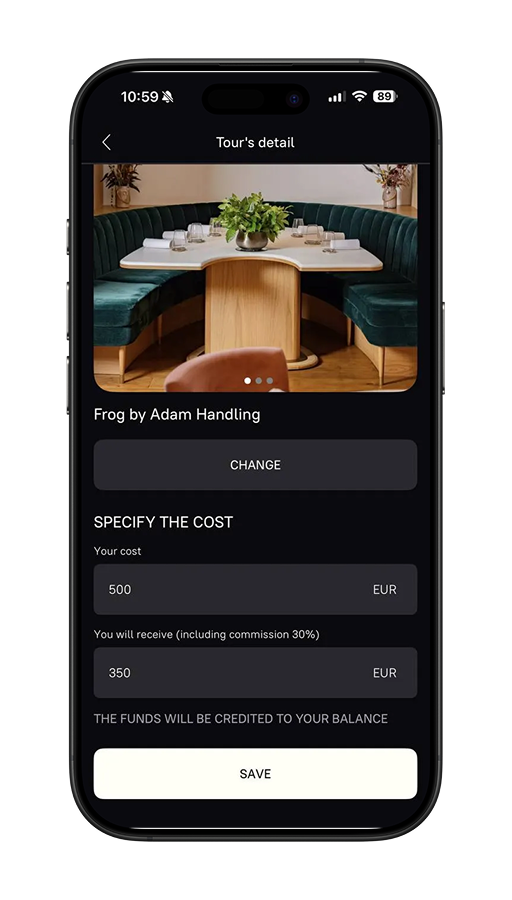
5.Setting the price
In the “Specify the cost” block:
• Enter the price of the tour (for example, 500 EUR).
• Below you’ll see the amount calculated with commission (you receive 70%).
• Tap Save — the invoice will be sent to the client in the chat.
6.Payment and the meeting
The client pays for the tour via the app. After payment:
• The tour is pinned to your profile.
• At the agreed time you meet and follow the planned route.
7.Completing the tour
After the tour ends, the funds are held in the app.
To withdraw your payout, send a request to support — the team will review the tour and transfer the payment to your account.